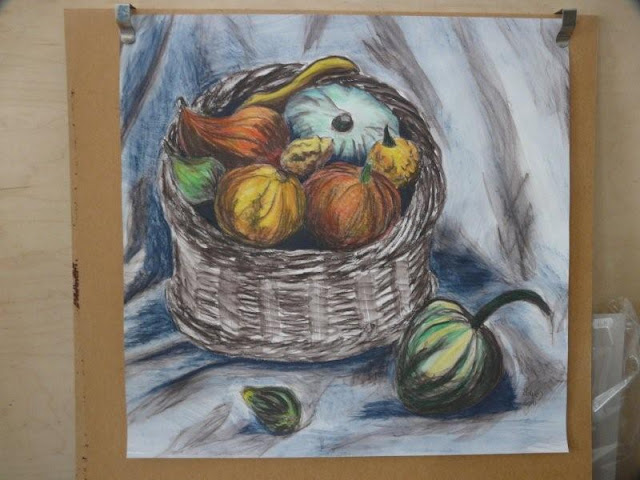
I've been intrigued by Derwent's new Inktense products, so today I bought some to see how they handle. Originally intending to buy the 24 block set, this proved to be sold out so I bought the 6 pencil blister pack (red, yellow, green, blue, violet and black) and 3 blocks in sea blue, indigo and bark (sepia). I also got the grippers as handling them in the shop I could see they were readily staining my fingers.
On the way home I stopped at the farm shop and discovered a big basket of squashes, which seemed perfect for a trial subject, and once back in the studio I arranged them with an old wicker market pannier on a table. I didn't have any hessian but draped a sheet over the surface to give some background interest.
I fixed up a sheet of A1 cartridge paper on the easel and used the sepia coloured block to make the initial drawing. I found I needed two grippers on the block otherwise the exposed end was really staining my palm. They have an interesting texture, not quite waxy, slightly like a chinagraph pencil but less sticky, and I needed to go over lines to bring up the tone at the drawing stage.
Next I started to wash over the marks with a large watercolour brush. At this point I discovered how intense the pigment actually is, and in future I'll be using it a lot more sparingly in each layer.
I achieved the basket weave by broad downward strokes followed by horizontal lines in between with a round brush- I quite liked the result and didn't want to make it too fussy.
Next I got to put some colour in. By now aware of how strong the pigment was, I applied it much more thinly, and although only using red, yellow and green for most of the fruit- with a touch of blue on the pale green pumpkin- found it made a nice range of orangey-reds and greens. The brush does pick up a lot of pigment though, and needs to be cleaned almost every stroke to avoid muddy mixing. Another point to note is that any undissolved pigment from a layer will of course disolve when working on the second, which is not always desirable. I found that I could sufficiently erase left-over areas with a plastic eraser to remove the unwanted colour.
Another thing I found was that the drying time was surprisingly quick, so on larger areas you don't have much time to get an even layer of water without using too much. I work with acrylic paint, which I think was a bonus, as unlike watercolour Inktense is permanent once dry. I found that a layer of indigo over the original sepia produced a wonderfully vibrant almost-black in the shadows between the fruit.
Having got to this stage I now needed to decide how to crop the image, as there was far too much background, and eventually, after much laying of sheets of paper over parts of the page, went for a square approximately 50cm each way.
Having altered the format of the picture plane I spent some time looking at where I needed to do more, including looking at it in the mirror. I decided I needed a little more in the way of shadows to ground the basket onto the surface, so I added more indigo to the top left edge and defined the right side of the basket. I pulled this area past and below the stalk of the foreground squash to tie it in to the composition. The final version is below.
I really enjoyed using these, finding it a nice halfway point between drawing and painting. Some of the darker colours look very black when drawn on the surface, and adding water reminds me of the magic painting books we used to have as children. I'll certainly be investing in more, I especially like the permanent nature of the dissolved pigment, and it can be overworked with just about any media which makes the possibilities almost endless.
Inktense are also recommended for use on silk, and I'm curious to find out how well they'll work, especially as I used to find colours dulled when fixing with an iron, and these are permanent when dry, so I'm hoping for vibrant results. Now I just need to find where my silk and stretcher frames are...I'll let you know how I get on.


No comments:
Post a Comment